


Winter Crafts for Toddlers: Cotton-Ball and Paper Plate Snowmen
Winter crafts for toddlers that truly suit ages 2–3: build a fluffy cotton-ball snowman and a paper plate snowman face with big, press-on pieces, simple steps, and adult-handled glue — two finished snow friends in one cozy session, with a gallery moment at the end.
The best winter crafts for toddlers use big pieces and simple actions: press cotton balls onto three adult-glued circles to build a fluffy snowman, then frame a paper plate with cotton and add large press-on features for a second snowman face. Adults run the glue and handle all details; toddlers press, place, count, and display.

The short version
- Two crafts, one session: a cotton-ball snowman first, then a paper plate snowman face.
- The adult is the glue department; the toddler is the pressing department — that split makes it work.
- Three glue circles — big, medium, small — become a counting and stacking lesson in cotton.
- All pieces are large by design: big felt eyes, triangle noses, wide paper scarves, zero small parts.
- Finish both crafts fully — faces, scarves, hat — so each snowman feels complete before moving on.
- End with a gallery moment and a cotton-hunt tidy-up; pride is part of the curriculum.
- Age
- Ages 2–3
- Prep
- 10 min
- Play time
- 35 min
- Mess
- Some
- Difficulty
- Easy
- Where
- Indoor
Why kids love this
Toddlers love cotton balls the way they love snow itself: soft, squeezable, and endlessly pressable. These winter crafts for toddlers turn that love into two real snowmen a two-year-old genuinely helped build — every cotton ball they press stays pressed, every piece they place stays placed. There is no wrong way to make a snowman fluffy, which makes this the rare craft where a toddler's instinct (more cotton! more!) is exactly right.
What you'll need
- A bag of cotton balls (large ones are easiest for toddler hands)
- Sturdy plain paper or card in a winter color for the first snowman's base (no printing or writing on it)
- Two plain white paper plates for the second snowman's face — one is a spare for a sibling, a redo, or a parent snowman
- Child-safe glue in a bottle an adult squeezes, or a glue stick for the plate craft
- Large press-on pieces for faces and details: big felt or foam shapes, large pom-poms, and wide paper strips for scarves (all pieces large — see Safety notes)
- A washable marker for the adult to add tiny details only if wanted (optional; faces work without it)
- A tray or mat under each child to define the workspace, plus a damp cloth for gluey fingers
- A little bowl for each toddler to hold their cotton balls — bowls stop the great cotton migration
Before you start
1. Cover the table, lay a tray in front of each seat, and put cotton balls in personal bowls — one bowl per toddler, refills from the adult. 2. Pre-cut everything: paper scarves and hat shapes, felt face pieces, and the base paper. Toddlers craft; adults scissor — cutting happens before the session, not during. 3. Test the glue flow yourself so dots come out toddler-sized, not puddle-sized. 4. Set the finished-example expectation aside: show no sample snowman. Toddler snowmen are supposed to look like toddler snowmen.
How to do it
-
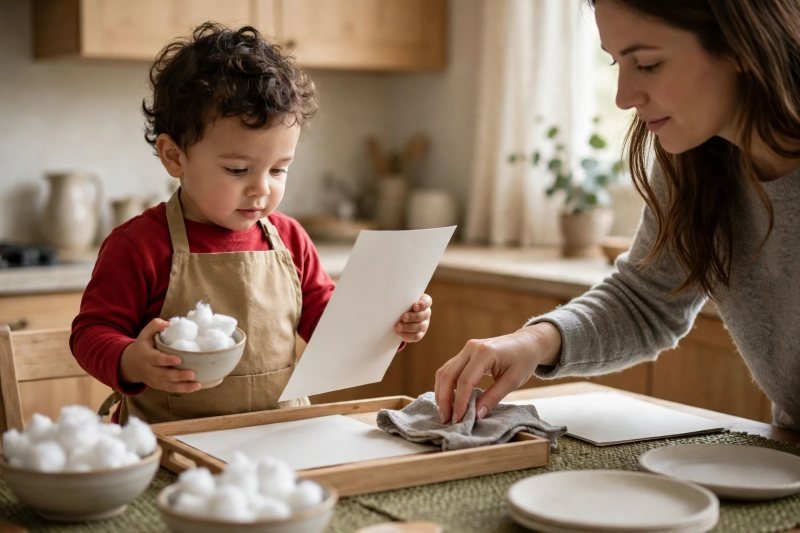
Cover the table and give every toddler a cotton bowl. Winter crafts for toddlers succeed or fail on setup, so start like a professional: cover the table, set a tray in front of your toddler's seat, and place a small bowl of cotton balls on the tray next to the plain base paper and a damp cloth. Say: "This is your snow station. Your snow lives in your bowl." Put on the craft apron or old shirt — glue is coming, and nobody should be dressed for a photograph. Keep the glue bottle on your side of the tray; at this age the adult is always the glue department, and the toddler is the pressing department — that division of labor is the whole secret of toddler crafting. Station ready, start the first snowman with the glue circles that become its body.
-
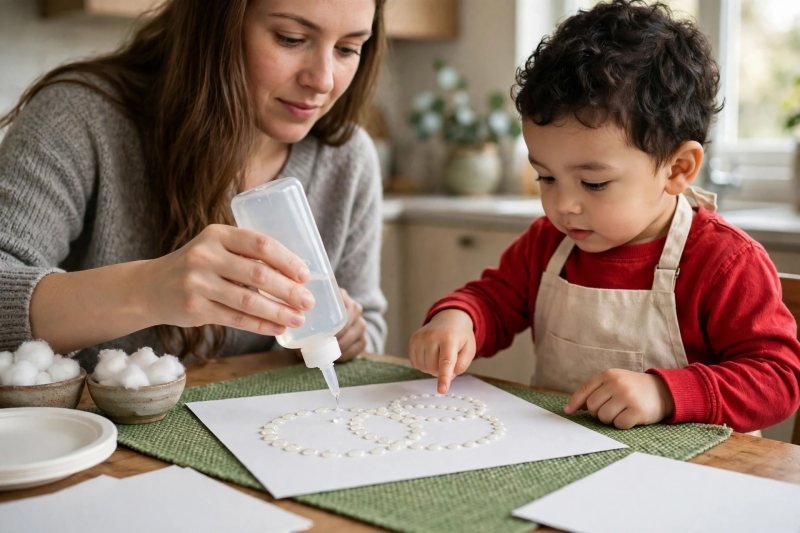
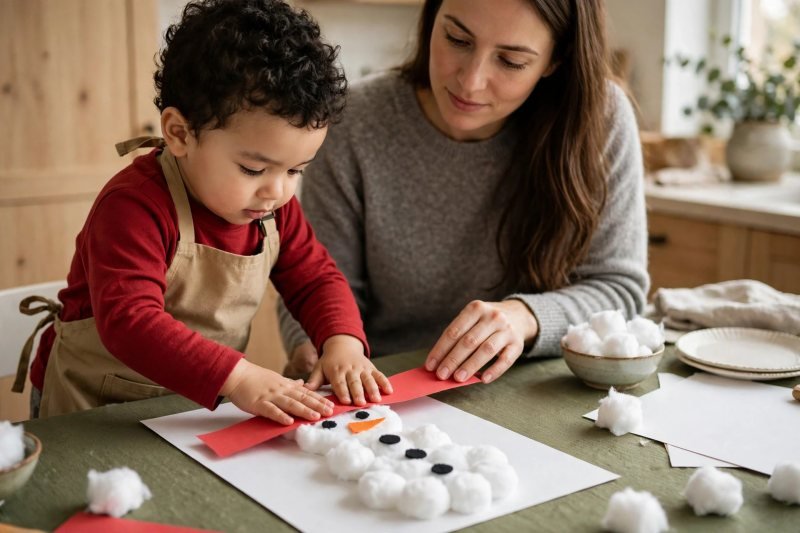
Draw the snowman's body with three glue circles. Pick up the glue and, on the base paper in front of your toddler, squeeze three overlapping circles of glue dots — a big one at the bottom, a medium one above it, and a smaller one at the top for the head — narrating the stacking as you go: "Big snowball, middle snowball, little snowball head." Dots, not puddles: a field of small glue dots inside each circle outline holds cotton beautifully and dries before patience does. Your toddler's job in this step is quality control — pointing at any spot you missed and shouting "snow there!" Say: "You tell me where the sticky goes." Circles glued, hand over the bowl — the pressing festival is about to begin.
-
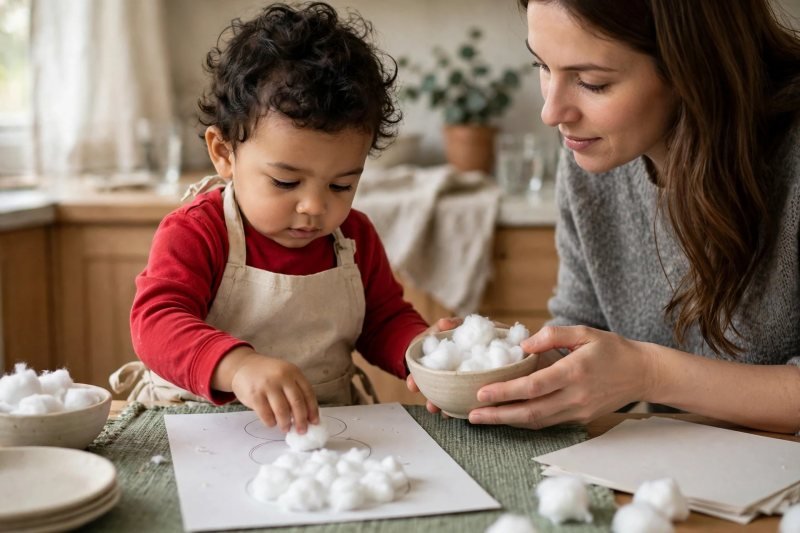
Press cotton balls to build the fluffy three-ball body. Now the heart of the craft: your toddler takes cotton balls from the bowl one at a time (or gloriously, by the fistful) and presses them onto the glue circles until all three snowballs are fluffy and white. Demonstrate the press once — place, push gently, let go — then let toddler technique take over; overlapping, lopsided, and extra-fluffy are all correct. This pressing is genuine hand work, the same pinch-and-place skill these fine motor activities for preschoolers build for older children, in its softest first form. Count together as the head fills in — "one, two, three snowballs!" — because a body made of three is a counting lesson wearing a craft apron, in the spirit of these counting activities for toddlers. Say: "Press, press — make him fluffy!" Body built, give the snowman a face and a personality.
-
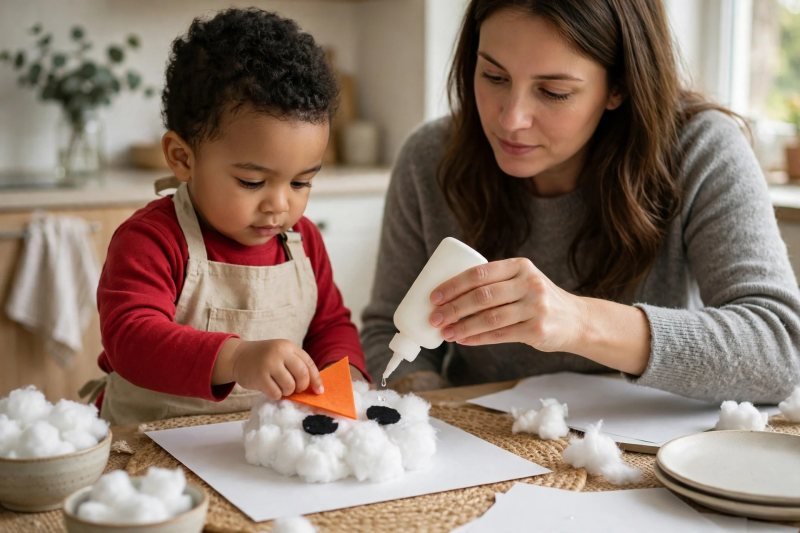
Add the face and buttons with big press-on pieces. A snowman becomes someone the moment the face lands: set out the large felt or foam pieces — two big eyes, a triangle nose, and three big "buttons" — and squeeze a glue dot for each spot as your toddler directs traffic ("Eye goes here!"). Your toddler picks each piece up and presses it into place; you handle any repositioning quietly with a fingertip while praising the placement. Big pieces only, always — at this age every craft supply is a potential mouth visitor, so anything small stays in adult hands or out of the craft entirely. If a smile is wanted, that is the adult's one marker moment, drawn after the pieces dry a little. Say: "Hello, snowman! He can see us now." Face on, dress him properly for the weather he lives in.
-
Finish snowman one with a paper scarf and stick arms. Complete the first craft so it feels finished before energy moves on: glue a wide paper strip across the snowman's neck as a scarf, with a second short strip hanging down as the scarf's end — your toddler chooses the scarf's color and presses both strips flat with both palms, the two-handed press being a small triumph of coordination. Add two thin paper strips angled from the middle snowball as arms, or let your toddler place real collected twigs if you gathered some, with adult help for the gluing. Stand back together and admire him properly — name him, if your toddler is a namer. Say: "Snowman number one: done! He needs a friend." Set him aside to dry where little hands can see but not squeeze him, and bring out the paper plate for snowman number two.
-
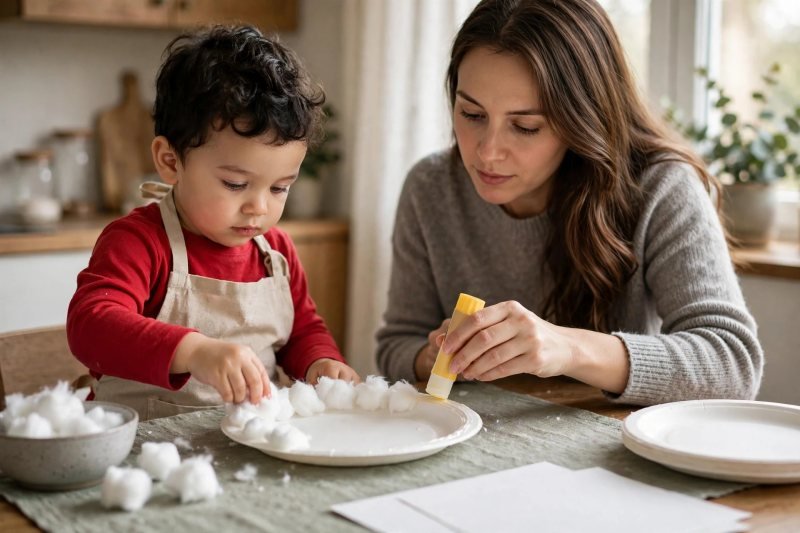
Start the paper plate snowman with a cotton-ball rim. Turn the paper plate face-up on the tray and run a ring of glue dots around its inner rim — this time your toddler can help squeeze the glue stick around the edge if you use one, a first taste of glue-department privileges under close supervision. Press cotton balls all the way around the rim together, end to end, until the plate wears a full fluffy frame; gaps get an extra ball squished in — toddlers are naturals at this repair. The middle of the plate stays smooth and empty: that is the face canvas, and its emptiness is the design. The plate is a forgiving canvas for the same reason a paper plate Christmas wreath works so well as a next craft — big shapes, no fiddly parts. Say: "His face is round like the moon, with fluffy hair all around." Rim complete, build the second face — bigger, simpler, and funnier than the first.
-
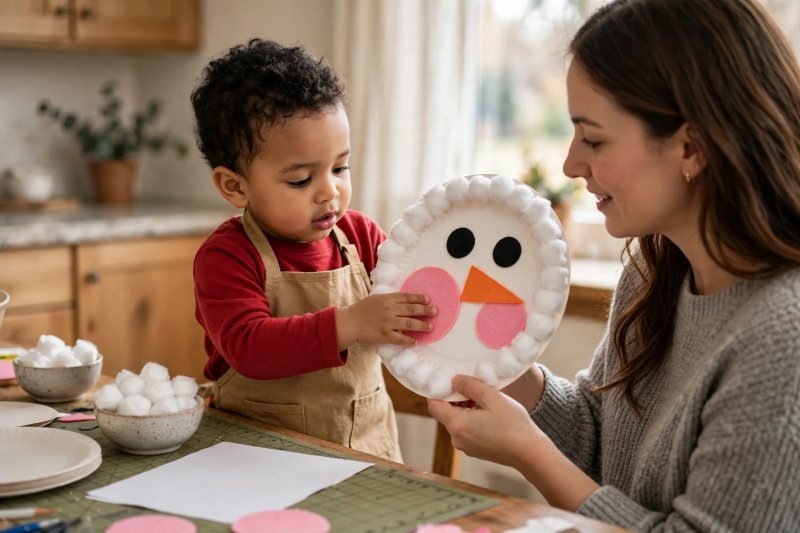
Give the plate snowman a big, bold face. Faces on a plate are wonderfully forgiving because everything is oversized: two large eyes pressed high, the triangle nose in the middle, and — the toddler favorite — big round cheeks, placed with maximum ceremony. Work exactly as before: you dot the glue where your toddler points, your toddler presses each piece home with a palm-pat and announces it ("Nose!"). Because the plate is rigid, this snowman can be held up mid-making for progress checks in the air — do this often; a snowman who can be waved at is a snowman who stays interesting. Say: "Two eyes, one nose — who is he looking at? He's looking at YOU." Face finished, this snowman gets dressed from the top down instead.
-
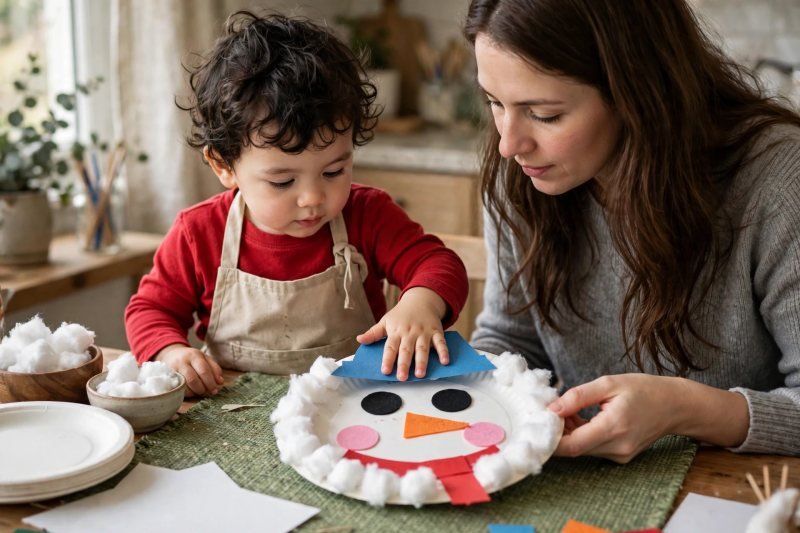
Top the plate snowman with a paper hat and scarf. Every snowman in this session leaves dressed: glue the pre-cut paper hat shape across the top of the plate — a simple rectangle band with a square top, or a rounded cap shape, in whatever color your toddler picks — and press it down together, counting the pats. Then add the matching paper scarf along the bottom of the plate, two strips in the same style as snowman one's, so the pair read as family. Your toddler can tear a few tiny paper "snowflakes" to sprinkle around both crafts' edges if tearing is their joy — tearing paper is a legitimate toddler craft skill and the sound alone delights. Say: "Hat on, scarf on — now he's warm in his pretend winter." Both snowmen complete, give them the audience they deserve.
-
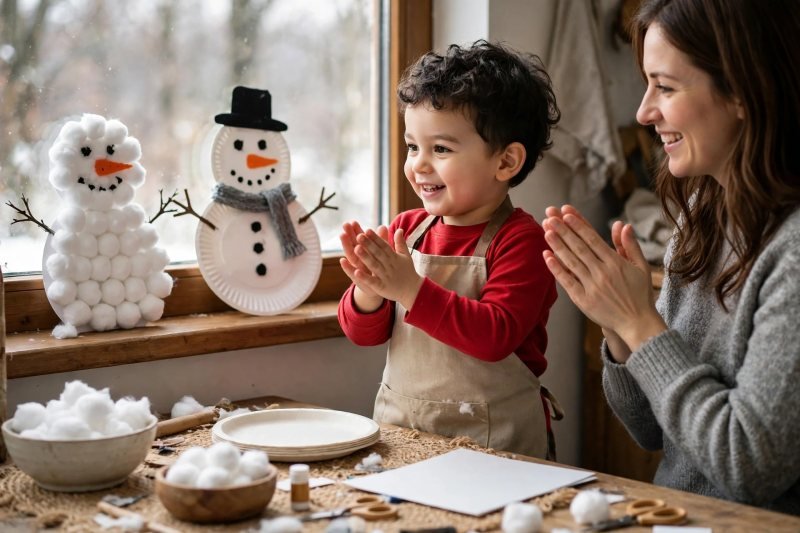
Hold the gallery moment: display both snowmen side by side. Crafts that disappear into a drawer teach nothing; crafts that get a gallery teach pride. Prop both snowmen up — the paper snowman on a shelf or windowsill, the plate snowman beside it or taped gently at toddler height — and do a formal viewing together: walk up, admire, applaud, and let your toddler tell any available audience (the other parent, a grandparent on a call, the cat) which parts they made: "I pressed ALL the snow." Take the photo now, in the good light, with the artist standing between their works if they will. Once the snowmen have had their season on the shelf, these Christmas crafts for toddlers take over the same display spot. Say: "Two snowmen, made by you." Gallery admired, close the session the way every good craft session closes — with a tidy-up that is itself part of the fun.
-
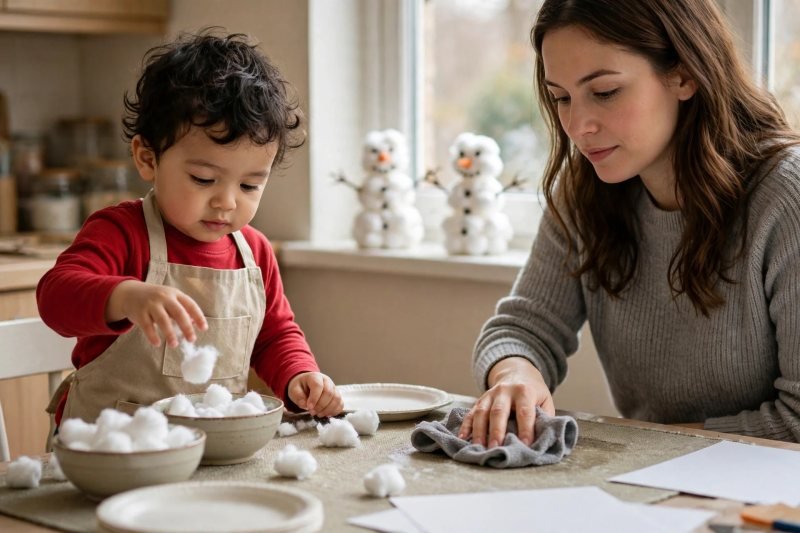
Tidy the snow station and wash the glue away together. End inside the activity, not after it: cotton balls that escaped go back in the bag with a "snowball hunt" — your toddler finds and bowls every stray while you wipe the tray and table with the damp cloth, cap the glue, and move the drying snowman to its safe shelf. Aprons off, then straight to the sink for the warm-water hand wash, scrubbing gluey fingers together and inspecting them clean — "Snow melted, hands clean!" Store the leftover pieces in the craft box as a set, because a winter afternoon next week may demand a snowman family expansion — or keep the snow play going with indoor snow and ice play, the same cold-weather joy with zero drying time. Say: "We made snowmen AND a clean table." Session complete — two snow friends, zero tears, one very proud artist.


Make it easier
- One craft only: the cotton-ball snowman alone is a complete session for the youngest toddlers or the shortest attention spans — save the plate for next time.
- Pre-glue the circles yourself before calling your toddler over, so the session starts at the pressing (the part they love) with zero waiting.
- Bigger canvas: build the cotton snowman on a large tray or cookie sheet instead of paper — edges contain the cotton and little hands alike.
Make it harder
- Add a snow scene: cotton drifts along the bottom of the paper, torn-paper snowflakes falling, and a cotton "path" between the two snowmen displayed together.
- Let your toddler run the glue stick solo on the plate rim (washable glue, close watching) — the promotion from pressing department to glue department is a big deal at three.
- Mix a winter sky together first — a little blue and white paint swirled on the base paper before the snowman goes on — an easy first step into color mixing activities for preschoolers once your toddler is ready.
Other ways to play it
- Snowman family: make a plate snowman per family member, sized by plate or cotton count, and line them up in height order on the shelf.
- Photo snowmen: print nothing and draw nothing — instead, glue a small photo of your toddler's face as the plate snowman's face for a keepsake grandparents request by name.
- Sensory snow table: skip the glue entirely some days — a bin of cotton balls, scoops, and the plates to fill and dump is the same winter joy with zero drying time.
How it changes by age
- Ages 2–3: the guide as written — adult runs all glue and all small pieces, toddler presses, places, counts, and tears; sessions run 30–40 minutes with the gallery as the finale.
- Ages 4–5: children squeeze their own glue dots, cut simple scarf strips with child-safe scissors under supervision, and add drawn details — buttons, smiles, hats — themselves.
- Ages 6–8: graduate to full snow scenes: layered paper backgrounds, cotton blizzards, and snowman stories written or dictated beneath the artwork.
- All ages: the rule that never changes — pieces are sized for the youngest crafter at the table, and the adult is the glue department until a child proves otherwise.
What they're learning
Fine motor pressing and placing: picking up, positioning, and pressing cotton balls and big pieces builds the pincer control and hand strength behind later writing. Early counting and stacking: three snowballs, counted in order, built big-to-small — size sequencing and one-to-one correspondence in cotton form. Face and body concepts: eyes, nose, buttons, scarf, hat — naming and placing body and clothing parts builds vocabulary on a snowman before a mirror. Pride and process: a gallery moment at the end teaches that making things finishes with showing them — the seed of every future show-and-tell.
Clearing up
The snow station melts away in minutes: stray cotton balls are hunted into the bag (toddlers insist on finding the last one), the tray and table get a damp-cloth wipe while glue is still fresh, scarves and felt pieces return to the craft box as a kit, aprons shake out over the bin, and hands get their warm soapy wash at the sink. The two snowmen, watching from the shelf, supervise the whole operation.
Questions parents ask
What winter crafts can a 2-year-old actually do?
How do you make a cotton-ball snowman with a toddler?
Are cotton balls safe for toddlers to craft with?
How long should a toddler craft session last?
What can I do with toddler winter crafts when they're finished?

save it for later
Pin this for the next rainy afternoon
Keep it on a board so it is there when you need it, rather than when you happened to find it.
Save to Pinterest
