


Snowman Crafts for Preschoolers: Build a Fluffy Cotton-Ball Snowman
Snowman crafts for preschoolers don't need real snow: build a fluffy cotton-ball snowman on winter-blue card with button eyes, twig arms, a paper hat, and fingerprint snow — one simple step at a time.
The easiest snowman craft for preschoolers is a cotton-ball snowman picture: glue cotton balls into three stacked circles on blue card to make the body, press on button eyes and a smile, add a paper carrot nose, twig arms, a hat and scarf, then stamp white fingerprint snow all around him.

The short version
- One continuous build: three cotton snowballs first, then the face, then the hat and scarf, then the weather.
- Press-and-hold counting ("press… two… three") is the gluing skill that makes cotton actually stay.
- Buttons are counted in and out — they're a choking hazard, so they live in a dish under adult eyes.
- Fingerprint snow is the finale: white paint dots falling around the snowman and a drift to stand on.
- The picture stays word-free; the snowman's name is part of the story your child tells, not writing on the art.
- Age
- Ages 4–5
- Prep
- 10 min
- Mess
- Some
- Difficulty
- Easy
- Where
- Indoor
Why kids love this
Preschoolers love a snowman they can build with their own hands even when there's no snow outside — and this one is pure touch: squishy cotton balls to pinch and press, buttons to place one by one, real twigs for arms, and a grand finale where their own fingerprints become the falling snow. The snowman grows circle by circle right in front of them, and every step has a job that is theirs alone.
What you'll need
- One large sheet of dark blue card or thick paper for the snowy sky background
- A big handful of cotton balls (about 40–50) in a bowl
- Washable school glue in a small pot or a glue stick for the paper pieces
- Two medium black buttons and five small black buttons or black paper circles for eyes and a smile
- One orange paper triangle for the carrot nose (or an orange crayon as backup)
- Two thin twigs from the garden for arms (dry pasta sticks work indoors)
- A black paper hat shape and a red paper strip for the scarf, cut by an adult beforehand
- White washable paint in a shallow dish for fingerprint snow
- A craft mat or old tray, plus a damp cloth for gluey fingers
Before you start
1. Cut the paper pieces ahead: one orange triangle nose, one black hat shape, one red scarf strip, and small black circles if you're not using real buttons. 2. Draw three stacked circles lightly in pencil on the blue card — a big one at the bottom, a medium one in the middle, a smaller one on top — as the snowman's body guide. 3. Fill the tray in order: cotton ball bowl, glue pot, buttons in a small dish, twigs, paper pieces, and the paint dish kept to one side until step 9. 4. Cover the table, roll up sleeves, and put the damp cloth within reach — this craft runs smoothly when the tidy-up tools are already out.
How to do it
-
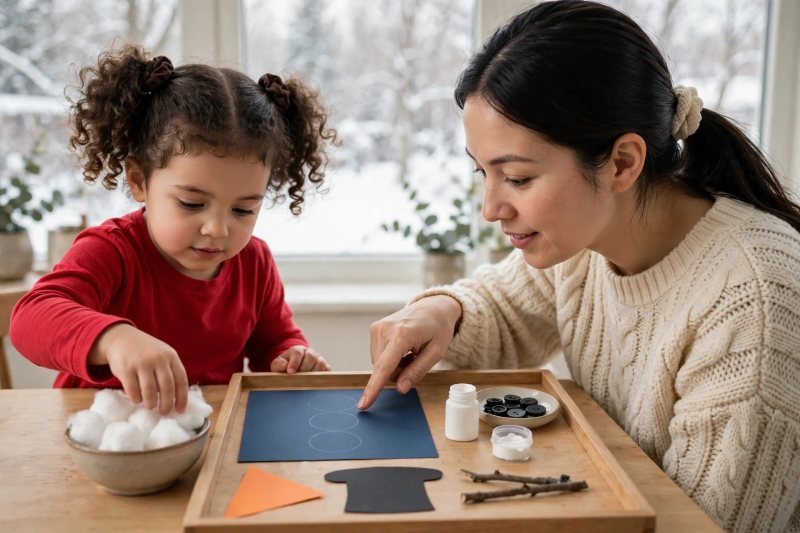
Lay out the snowman tray together. Start the session by putting every material where your preschooler can see and reach it: the blue card in the middle, the bowl of cotton balls beside it, buttons in their dish, twigs and paper pieces lined up like tools. Say the framing words that make this a building job, not just a craft: "Today we're building a snowman who never melts. He needs three round snowballs — big, medium, small — and you're the builder." Let your child touch everything once before any glue comes out; preschoolers who have explored the materials first glue with far more patience. Point at the three pencil circles and count them together — one, two, three — so the plan is visible before the first cotton ball moves. Tray ready: it's time to build the biggest snowball.
-
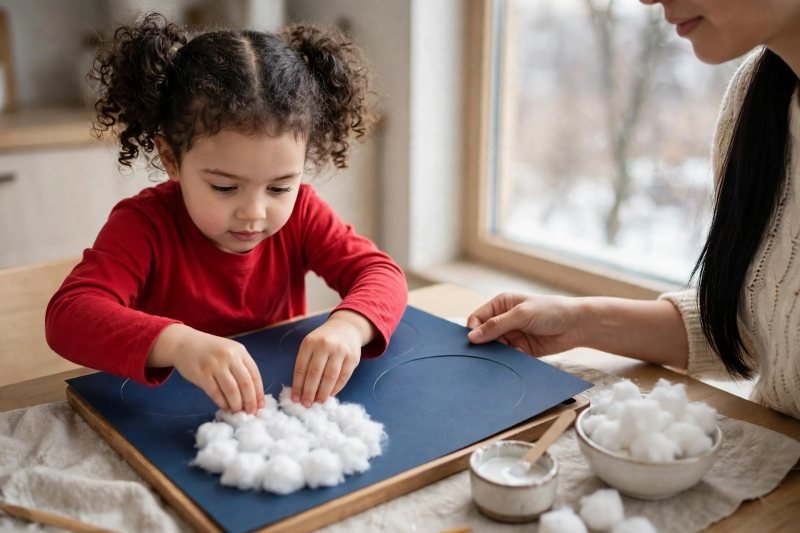
Glue the bottom snowball, cotton ball by cotton ball. Show your child how to spread glue inside the biggest pencil circle, then take one cotton ball, press it down, and hold for a slow count of three — "press… two… three… it stays!" Then hand over the job: your preschooler adds cotton balls one at a time, edge to edge, until the whole bottom circle is covered. Coach the pinch: small fingers pinching and placing cotton is exactly the fine-motor workout that fine motor activities for preschoolers build on purpose. If a ball pops up, that's a teaching moment, not a mistake — "More glue, press again." Keep going until the first snowball looks full and round, because the middle snowball stacks right on top of this rhythm.
-
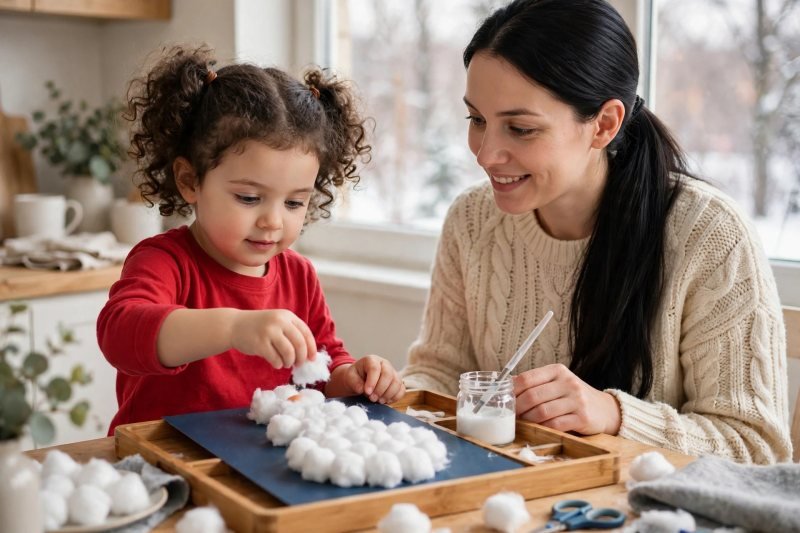
Build the middle and head snowballs the same way. Move up the snowman together: glue inside the medium circle, cotton balls pressed one by one; then the small circle for the head. By now your child knows the pattern — glue, pinch, press, count to three — so step back a little and let the independence show; your job narrows to refilling glue and admiring out loud. Say, "You're building him taller and taller — bottom, middle, head." If the circles drift a little lopsided, celebrate it: real snowmen lean, and a slightly wonky snowman has far more character than a perfect one. When all three circles are covered in white, the snowman has a body — but he still can't see, which is the perfect problem to solve next.
-
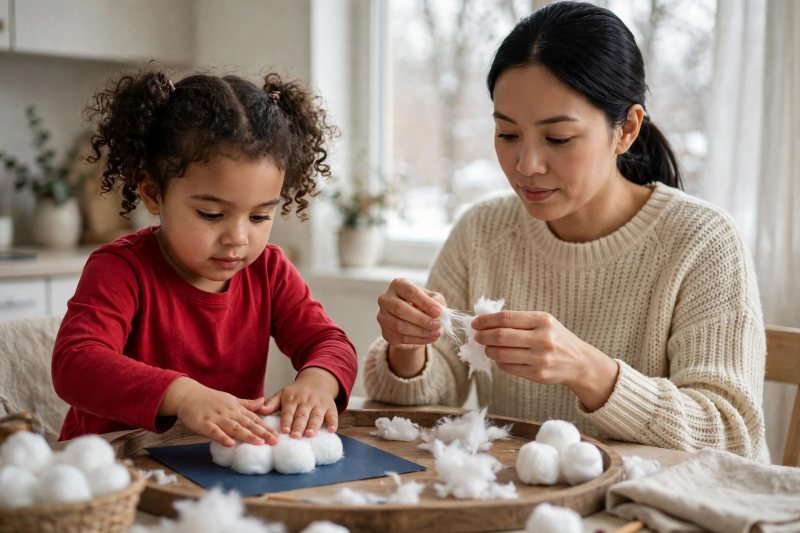
Pat and fluff the snow until every gap disappears. Before the face goes on, do the finishing pass builders call "making it snow properly": your preschooler gently tears a few cotton balls into wispy pieces — pulling cotton apart is deeply satisfying at this age — and pats the wisps into any blue gaps showing between the balls. Press the whole snowman flat with two palms, then fluff the edges outward with fingertips so the outline reads round and soft. Say, "Real snow is fluffy. Let's make him the fluffiest snowman on the street." This step matters visually more than any other: a gap-free, well-fluffed body is what makes the finished picture look like a snowman instead of three blobs. Body fluffed and round: now he gets a face.
-
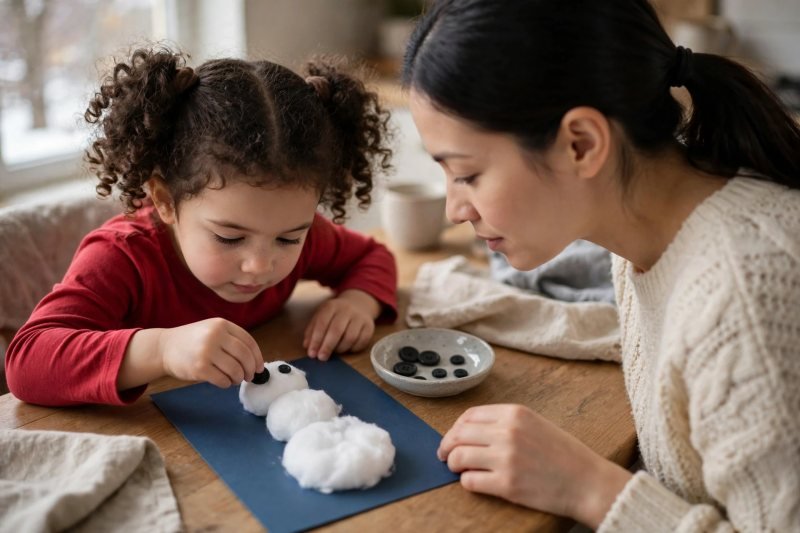
Press on the button eyes and a button smile. Set out the two medium black buttons and ask, "Where do his eyes go?" Let your child point first, then dab glue and press the eyes in place, one at a time, holding each for the count of three. Then line up the small buttons (or black paper circles) in a gentle curve under the eyes for a smile — your preschooler places them one by one, counting as they go: "One, two, three, four, five — he's smiling!" Fine placement work like this is slow on purpose; resist fixing a crooked eye, because a face the child placed entirely themselves is the one they'll show everyone. Eyes on, smile curved: the snowman can see and grin — he just needs a nose to smell the winter air.
-
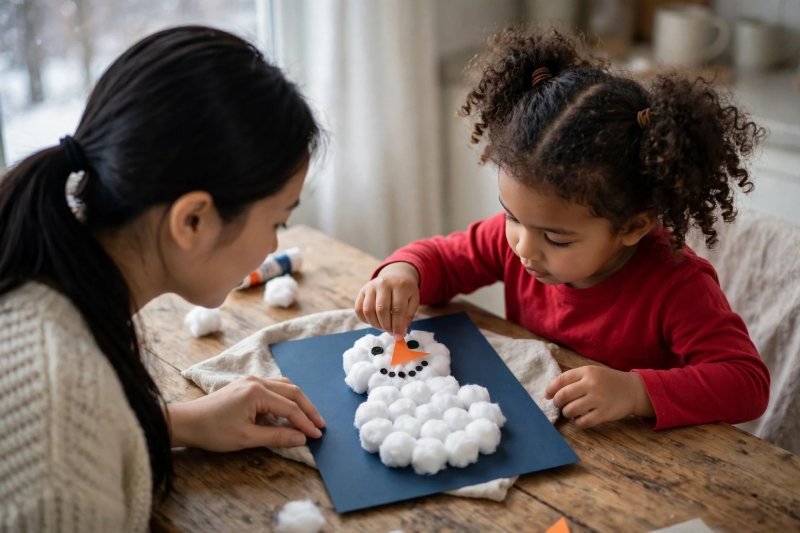
Glue the carrot nose right in the middle. Hold up the orange paper triangle and ask the classic question: "What do snowmen have for a nose?" — a carrot, always a carrot. Your child paints the back of the triangle with glue (a glue stick is easiest for paper) and presses it point-out in the center of the face, between and slightly below the eyes. Say, "Right in the middle — that's how he smells the snow." If the triangle slides, hold it together for the count of three and move on; a slightly tilted carrot nose reads as playful, not wrong. Stand the picture up for a quick look from a step back — builders always check their work — then lay it flat again, because a snowman this friendly deserves his arms next.
-
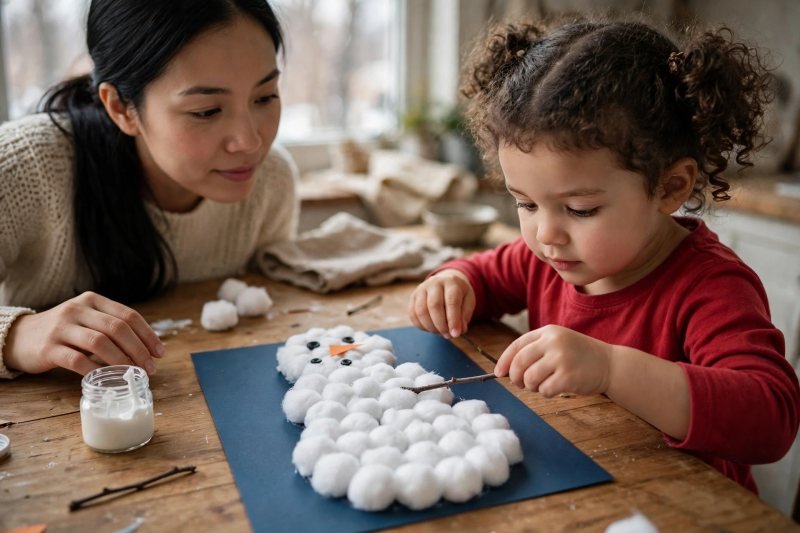
Give him twig arms that wave hello. Lay the two thin twigs beside the middle snowball and let your child choose which side each arm goes on — one waving up, one resting down is the classic pose. Press a generous line of glue along each side of the body, lay the twig on top, and hold it down together for a longer count — twigs are heavier than paper, so count to five and coach the patience: "Arms are heavy. Builders hold… and hold…" If a twig refuses to stick, a small piece of clear tape on the back of the card fixes it invisibly; say so matter-of-factly, because real builders use backup plans. Arms attached, he's nearly dressed — but a snowman standing in winter needs his hat and scarf before the snow starts falling.
-
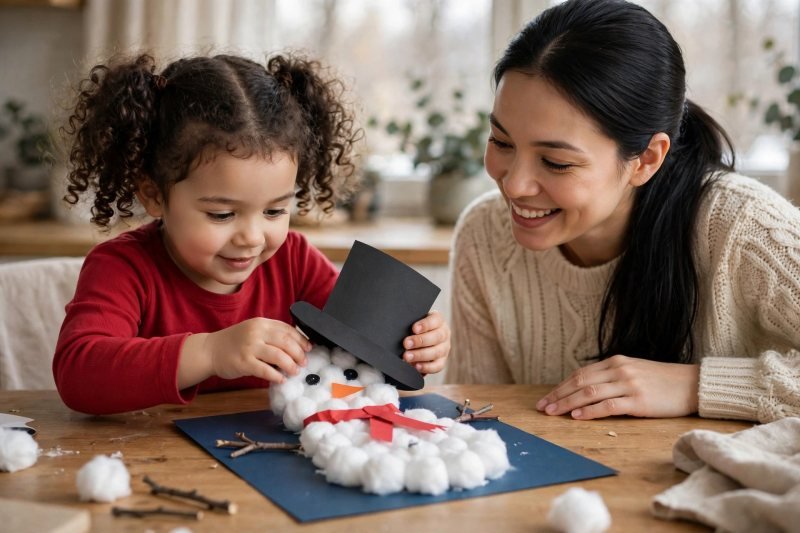
Top him with a paper hat and a cozy scarf. Dress the snowman in order, the way you'd dress for real cold: first the black paper hat, glued at a jaunty tilt on top of his head — your preschooler chooses the tilt, and tilts are where the personality lives. Then the red paper scarf: glue a strip across the "neck" where the head circle meets the middle circle, with one short end hanging down the body. Name the colors as you go — black hat, red scarf, orange nose — because this craft quietly teaches color words the whole way through. Say, "Now he won't be cold when our snow starts." Dressed head to toe: there's only one thing missing from this winter scene, and it's the weather itself.
-
Make fingerprint snow fall all around him. Bring out the dish of white washable paint — the step your preschooler has been waiting for. Show them how to press one fingertip flat into the paint, then stamp gentle dots all over the blue sky around the snowman: "Snow falls down — dot, dot, dot — from the sky to the ground." Scatter dots thick at the top, thinner near the bottom, then drag one painted fingertip in a wavy line along the bottom of the card for a snowdrift he can stand on. Mixing this exact shade is a nice echo of the play in color mixing activities for preschoolers — white over blue makes the sky feel frosty and deep. Wipe fingers on the damp cloth between stamps if the dots get blobby. When the sky is full of falling snow, the picture is finished.
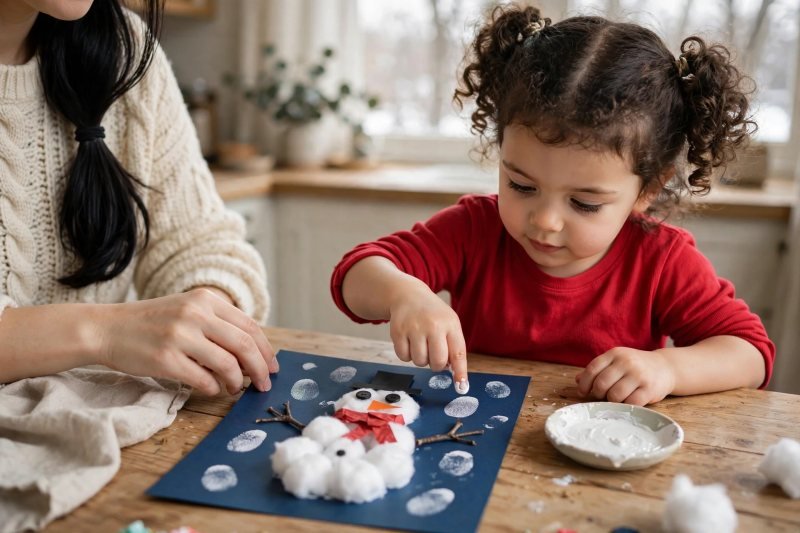
-
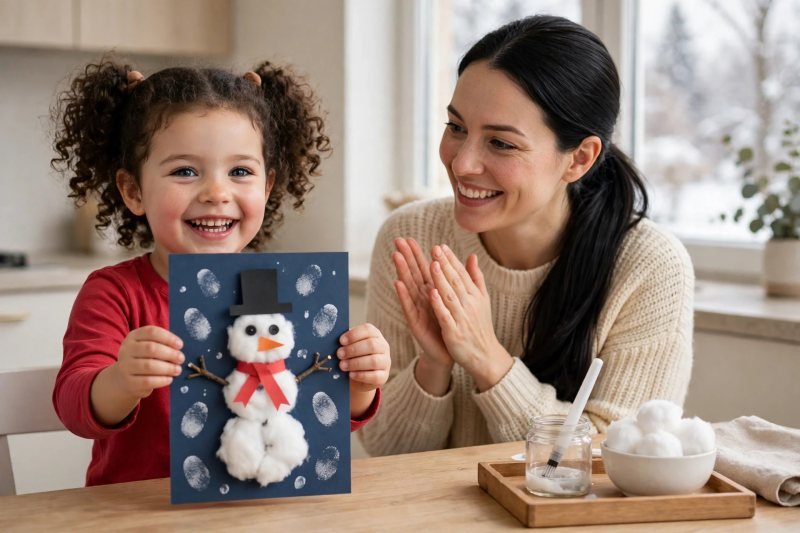
Hold up your snowman and give him a name. Lift the finished picture together, hold it at arm's length, and admire it properly: three fluffy snowballs, button eyes, a carrot nose, twig arms, a tilted hat, and snow falling all around. Ask the most important closing question in all of crafting: "What's his name?" — then write nothing on the front (the picture stays word-free and proud), but do say the name out loud and let your child tell the snowman's story: where he lives, what he waves at, whether he's cold. Prop the picture somewhere it will be seen all winter — the fridge, a hallway wall — and tidy the tray together, cotton scraps to the bin, buttons back in their dish. Sessions like this slot beautifully into a whole week of preschool learning activities at home, and this snowman will be greeting your family from the fridge until spring.


Make it easier
Pre-glue each circle yourself and let your child just press cotton balls into place — the placing and pressing is the core skill at this age. Use a glue stick instead of liquid glue and bigger cotton pads for the first snowball if small balls frustrate little fingers. Skip the paint step and add snow with white chalk dots or white circle stickers instead — same falling-snow effect, zero drying time.
Make it harder
Let your child draw the three circles themselves with a bowl, cup, and mug as tracing templates — early geometry hiding inside a craft. Add a counting challenge: exactly ten buttons down the body, counted aloud one by one as they're placed. Build a second, smaller snowman friend beside the first, and compare sizes with real words — taller, shorter, wider, fluffier.
Other ways to play it
- Paper plate snowman: glue cotton around the rim of a paper plate for the head, add the same button eyes and paper nose, and hang it on the door — the same plate skills make a paper plate Christmas wreath a natural next craft.
- Sock snowman: fill the toe of a white sock with rice or stuffing, tie it off in two places for the snowball stack, and dress it with the same hat, scarf, and buttons — a 3D snowman who can sit on a shelf.
- Snowman family portrait: one blue card, three cotton snowmen in different sizes — a grown-up, a kid, and a tiny one — named after your own family; and when the snowmen come down, Christmas crafts for toddlers take over the same display spot.
- Indoor snow play: when the cotton snowman is finished, keep the winter going with indoor snow and ice play — the same cold-weather joy with zero drying time.
How it changes by age
- Ages 2–3: do the gluing yourself and make pressing cotton balls, placing big buttons, and stamping fingerprint snow the child's whole job — expect a gloriously lopsided snowman and a shorter, happier session.
- Ages 4–5: the guide as written — independent gluing with coaching, button placement by counting, and full ownership of the face and the dressing steps.
- Ages 6–8: hand over the whole build, including drawing the circles, cutting the paper pieces with safety scissors, and designing extra details like stick arms with twig fingers or a button pattern down the body.
- All ages: the snowman is finished when the builder says so — a preschooler's "he needs one more snow dot" is always correct.
What they're learning
Fine motor control: pinching, pressing, and placing cotton balls and buttons builds the finger strength behind writing readiness. Early math: counting snowballs, buttons, and smile pieces; comparing sizes (big, medium, small); and ordering a three-part stack. Sequencing and planning: the snowman only works body-first, face-second, weather-last — a real beginning-to-end build order. Color and vocabulary: naming orange, black, red, and white in context, plus building words like fluffy, press, tilt, and drift.
Clearing up
Cotton is the whole cleanup story: sweep stray balls and wisps into one pile (make it a game — "who can find the most runaway snow?"), wipe the glue pot rim before the lid goes on, rinse the paint dish while it's still wet, and shake the craft mat outside. The damp cloth goes straight in the wash. Five minutes, and the only evidence left is a snowman smiling from the fridge.
Questions parents ask
What is the easiest snowman craft for preschoolers?
How do you make a cotton ball snowman stay together?
What can you use instead of cotton balls for a snowman craft?
How do you keep a snowman craft from getting too messy?
What age is a cotton ball snowman craft best for?

save it for later
Pin this for the next rainy afternoon
Keep it on a board so it is there when you need it, rather than when you happened to find it.
Save to Pinterest


